Matcha, matcha, matcha!
These matcha no bake cheesecake bites are super delicious and ready for any party, holiday occasion, or Friday night movie night. They are easy to make and don’t require any baking.
Matcha no bake cheesecake bites are bite-sized versions of the classic cheesecake dessert flavored with matcha, a vibrant green tea powder. If you’re looking for a taste of matcha and a delicious and easy-to-eat treat, then you’re in the right place!
There are two main ways to make matcha cheesecake bites: baked and no-bake. Baked matcha cheesecake bites have a crumbly crust, while no-bake bites have a more chilled and creamy texture. We’re going with the no bake option for that creamy and refreshing bite of match infused cheesecake.
What is matcha?
Have you noticed the craze around matcha lately? I have too, which is why I’ve got packets of unused matcha powder laying around my cupboard. So I decided to hop on the matcha band wagon and use it up. Matcha is a finely ground powder made from specially grown and processed green tea leaves. It’s traditionally used in Japanese tea ceremonies, but it’s become popular worldwide for its health benefits and versatility. Matcha is high in antioxidants and may offer benefits like protecting against cell damage and lowering the risk of certain diseases.
Matcha can be used in a variety of ways. Such as in smoothies, lattes, teas, baked goods, and even some savory dishes. Watch this space for more matcha recipes to come. There’s a latte good matcha recipes to create!

Ingredients
For the matcha filling:
- Organic Matcha Powder:
- Coconut Cream (or full fat coconut milk):
- Coconut Oil
- Lemon Juice: I always recommend freshly squeezed lemon juice if you have lemons laying around, but bottled lemon juice always works too.
- Maple Syrup: Any brand will work.
- Cashews: Raw and unsalted.
- Vanilla Extract
- Sea Salt: Fine sea salt instead of course sea salt.
For the Crust:
- Dates: These should be medjool dates (pitted). Or remove the pits from any unpitted whole dates
- Whole Almonds: Raw and unsalted.
- Coconut Flakes
- Coconut Oil: This is for greasing your tins or pan if you’re not using silicon molds.
How to make matcha no bake cheesecake bites
- Boil the cashews for 10 minutes, then let them rest in the hot water for an additional 20 minutes. Or soak overnight.
- In a food processor, blend the dates until they start to stick to the sides of the food processor.
- Add the almonds and coconut flakes to the food processor and blend on high for 2-3 minutes or until the mixture starts to come together.
- In a separate blender, (yes you need both the food processor and blender for this recipe, sorry!) blend together the coconut cream, coconut oil, lemon juice, maple syrup, cashews, vanilla and sea salt. This is everything except the matcha. Blend until smooth.
- Remove 1/3 -1/2 cup of the batter and set aside for decorative purposes. If you don’t want the decorative swirl, then skip this step.
- Add the matcha to the blender and blend for 1-2 more minutes, or until the batter turns completely green.
- Prepare your bite sized tins. I used a rectangular silicon mold for mine, but any 2-3 bite sized tin will work.
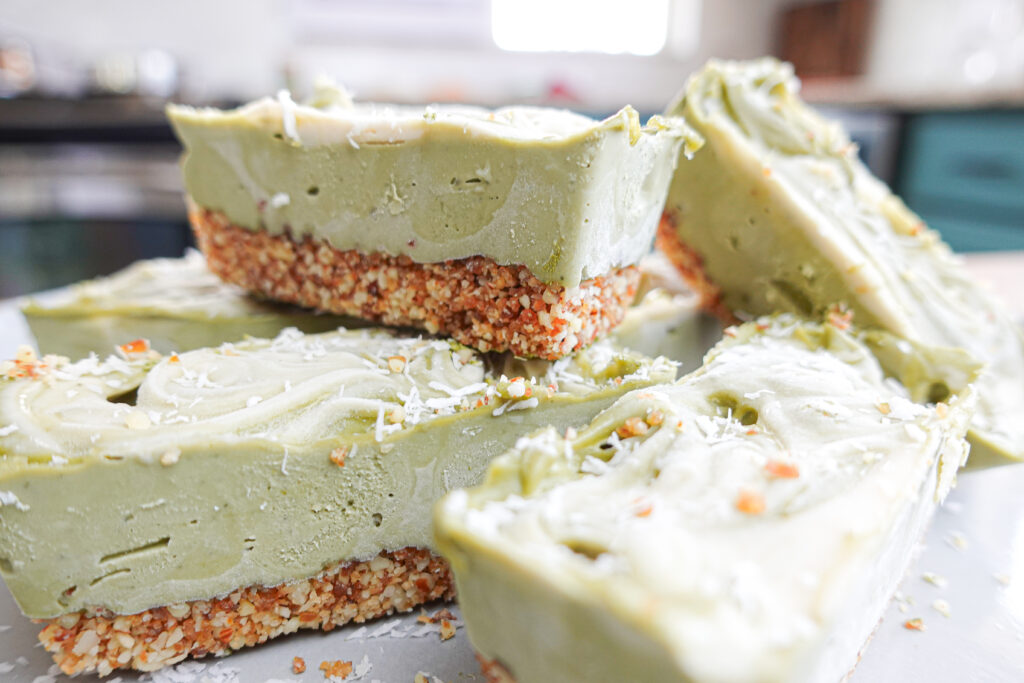
- Grease your baking tins if needed. Scoop out about 1-2 tbs (dependent on the size of your baking tins) of the crust mixture into each tin. Use your finger or the back of a spoon to press down the crust mixture into the tin.
- Fill your tins 3/4 full with the matcha batter (the green batter).
- If you’re going for the decorative swirl, fill the remaining space of your tins with the non-matcha batter (this will be the white batter).
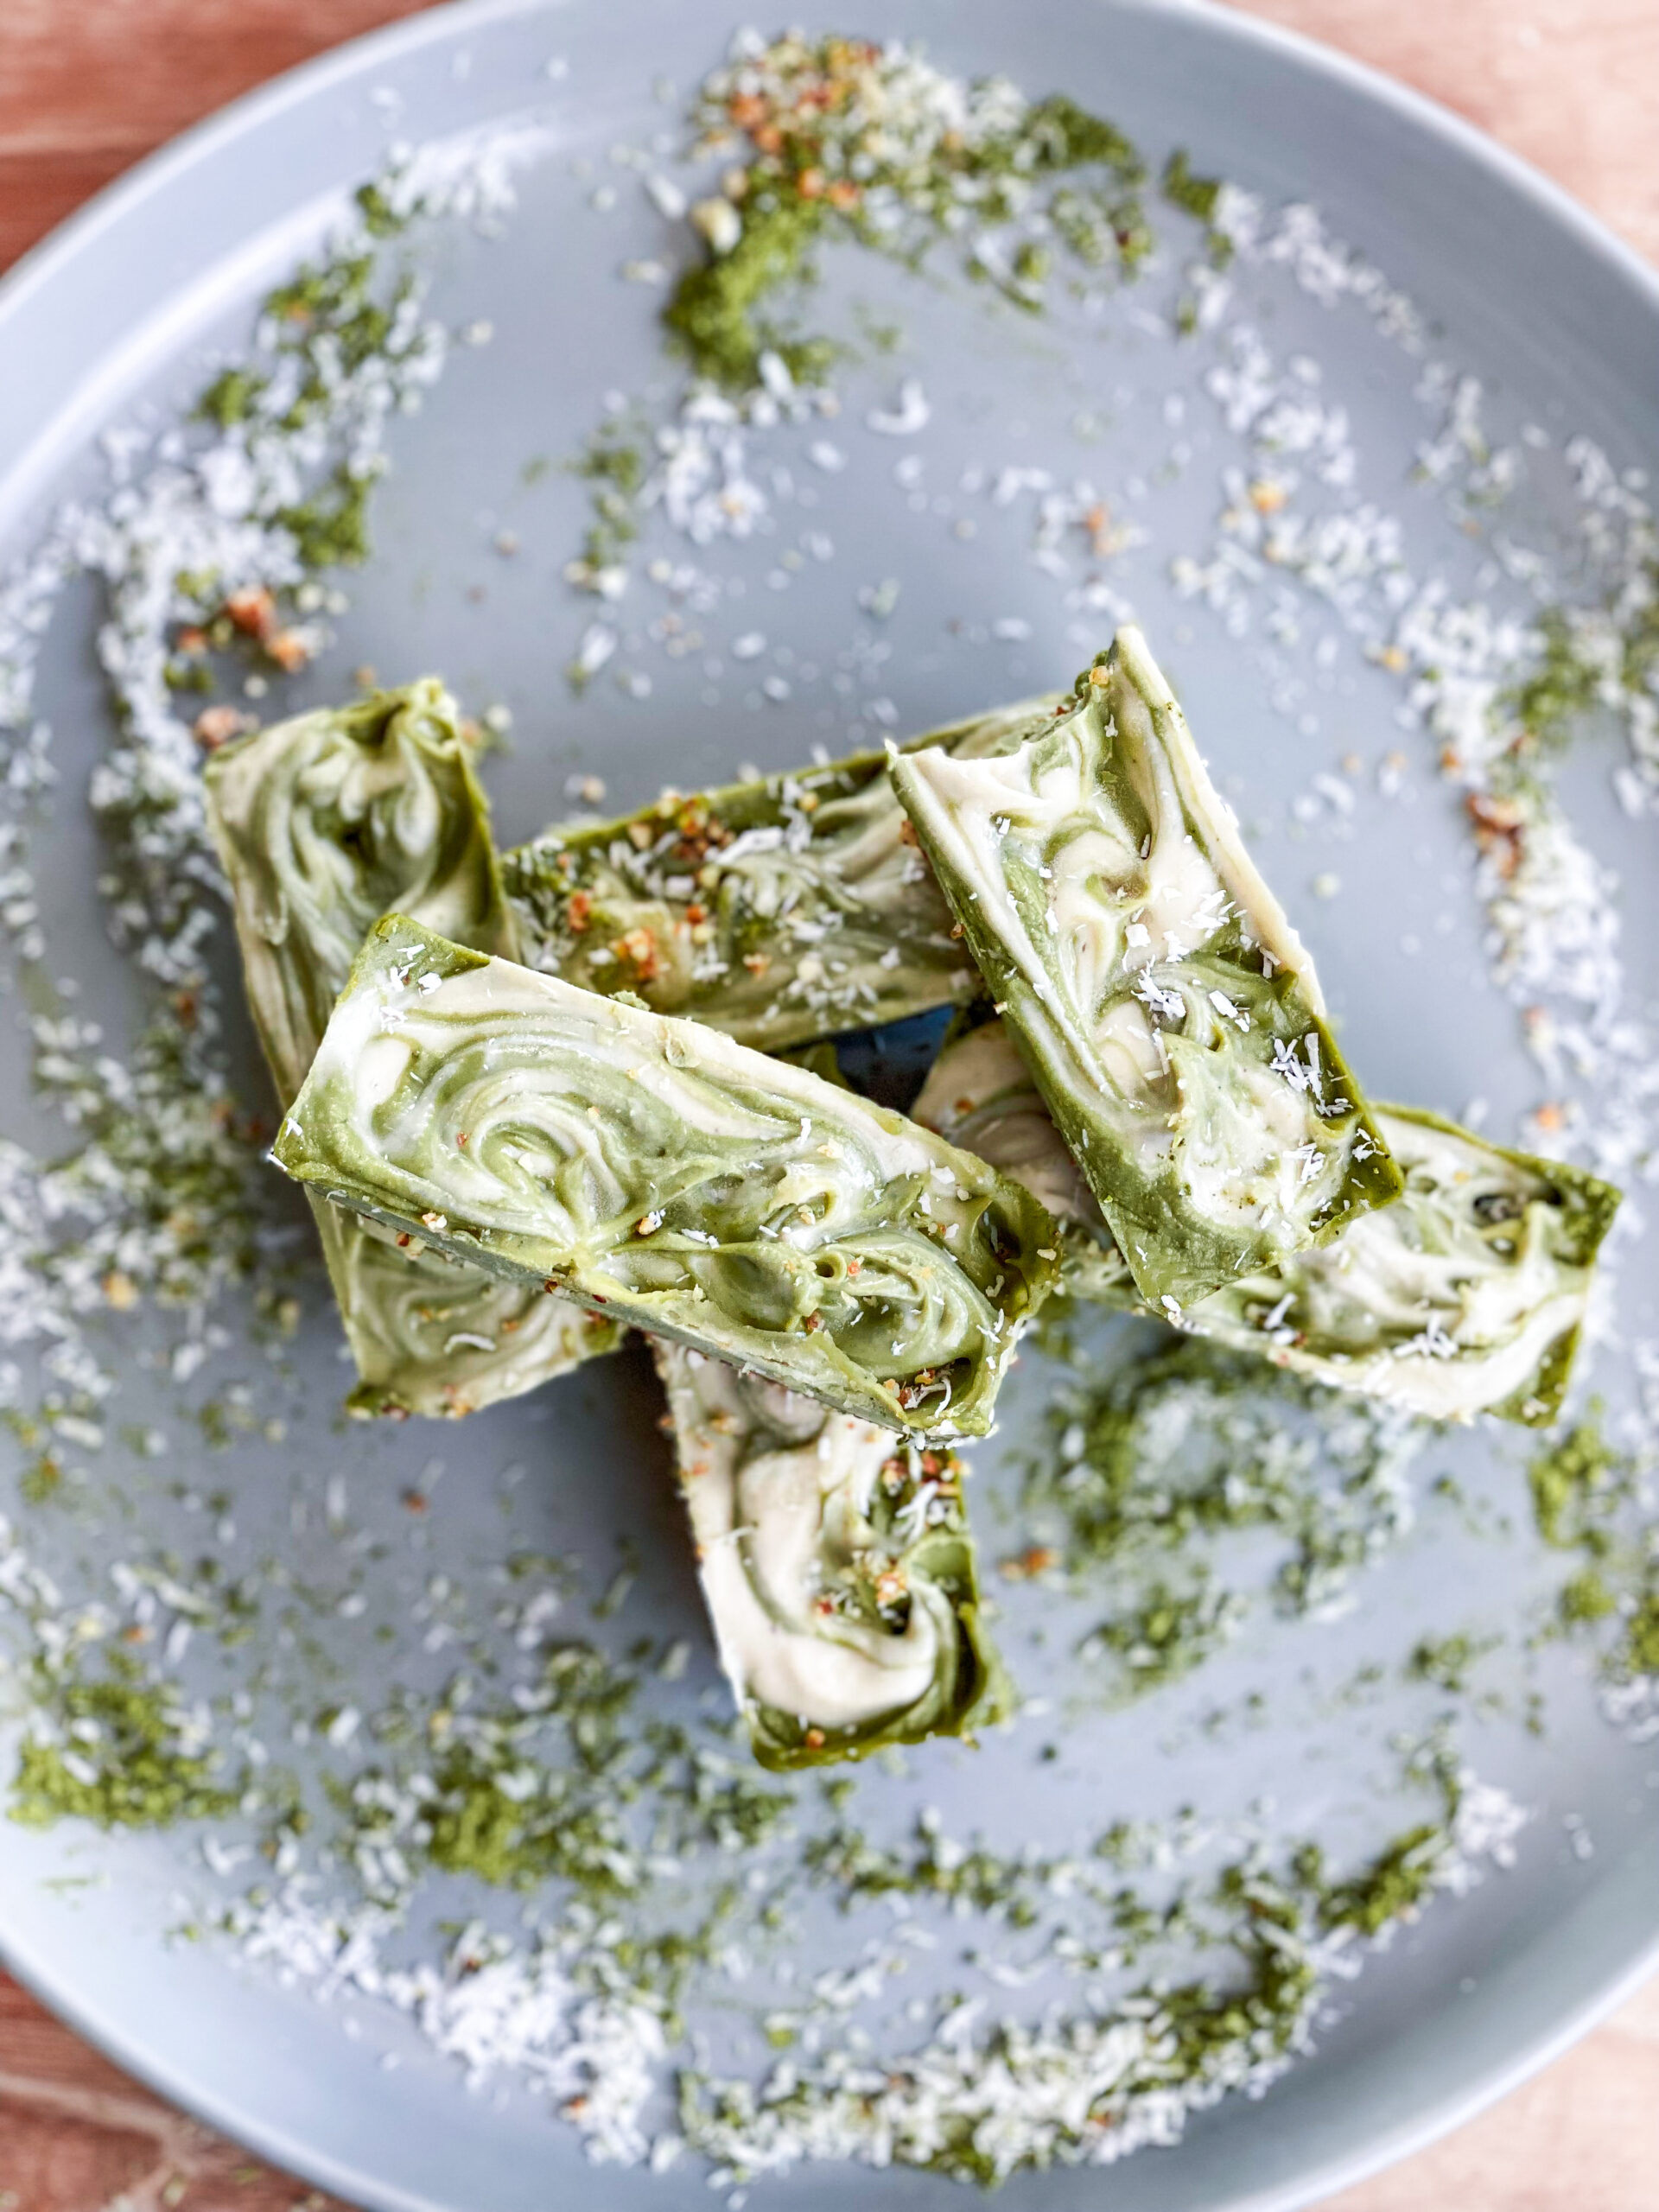
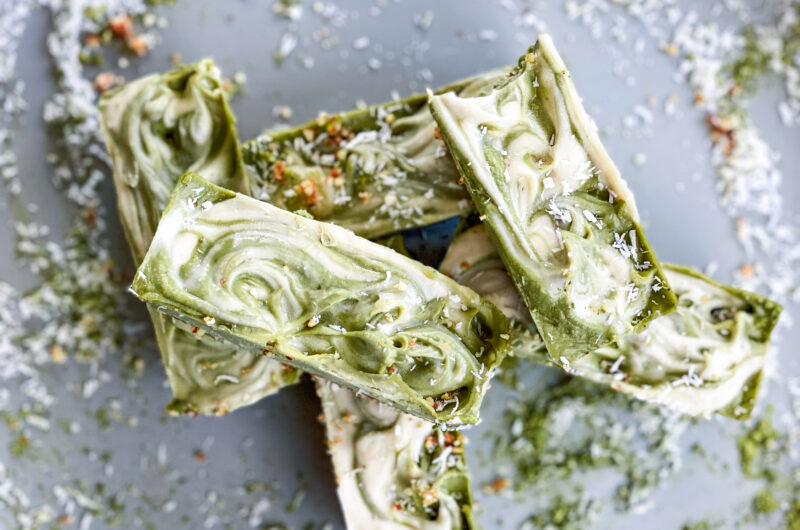
- With a toothpick, make small circles and swirls through the top of the cheesecake bites. You’ll start to see the white and green batter become a little mixed at the top.
- Next, place the tins in the freezer for 4 hours to set.
- When you’re ready to serve, take them out of the freezer and place them into the fridge for 2 hours before eating. Or leave them out on a countertop for 10-15 minutes before serving.
Matcha No Bake Cheesecake Bites
Course: DessertDifficulty: Medium12
servings20
minutes4
minutesDitch the oven and whip up some cool, refreshing matcha magic! This no-bake cheesecake is the perfect way to satisfy your sweet tooth and impress your friends with its vibrant green hue. Get ready for a burst of flavor that’s both sophisticated and playful – it’s the perfect treat for any occasion!
Ingredients
For the Filling:
1/3 cup coconut cream
1/2 cup coconut oil
1/3 cup lemon juice
1/3 cup maple syrup
2 cups cashews
1 tsp vanilla extract
1-2 tbs organic matcha powder
Pinch of sea salt
For the crust:
1/2 cup medjool dates
1/2 cup whole almonds
1/3 cup coconut flakes
1 tbs coconut oil
** for greasing baking tins
Directions
- Prep the cashews. Boil for 10 minutes, then let them rest in the hot water for an additional 20 minutes. Or soak for 2 hours or overnight.
- In a food processor, blend the dates until they start to stick to the sides of the food processor.
- Add the almonds and coconut flakes to the food processor and blend on high for 2-3 minutes or until the mixture starts to come together.
- In a separate blender, blend together the coconut cream, coconut oil, lemon juice, maple syrup, cashews, vanilla and sea salt. Blend until smooth.
**This is everything except the matcha. - Remove 1/3 -1/2 cup of the batter and set aside for decorative purposes.
- Add the matcha to the blender and blend for 1-2 more minutes, or until the batter turns completely green.
- Prepare your bite sized baking tins. I used a rectangular silicon mold for mine, but any 1-2 bite sized baking tin will work.
- Grease your baking tins if needed. Scoop out 1-2 tbs (dependent on the size of your baking tins) of the crust mixture into each tin.
- Use your finger or the back of a spoon to press down the crust mixture into each tin.
- Fill your tins 3/4 full with the matcha batter (the green batter).
- Fill the remaining space of your tins with the non-matcha batter (the white batter).
- With a toothpick, make small circles and swirls through the top of the cheesecake bites.
- Place the filled baking tins in the freezer for 4 hours.
- When you’re ready to serve, take them out of the freezer and place them into the fridge for 2 hours before serving. Or leave them out on a countertop for 10-15 minutes before eating.
- Devour & enjoy!
Notes
- Taste test your green and white batter before you assemble the cheesecake bites. You can decide how much of each batter you want in your bites before you start the decorative swirl.
- You can also reverse the green and white batter quantities if you want these to be predominately white with little green swirls.
- Do not skip letting these set in the freezer for 4 hours. This step is a must!
- I prefer the cheesecake bites after they’ve defrosted in the fridge for 2 hours over leaving them out on the counter for 15 minutes. The texture is creamier when left to defrost in the fridge.